This project consists in the realization of a Ball-Plate system with 2 degree of freedom which will control the position of the ball by tilting the plate.
-
Two servomotors will allow the table to be oriented with a certain angle of inclination to counterbalance the movements of the ball.
-
A Pi camera placed above the device will feed live images of the plate to a Raspberry PI 4B.
-
A Python program will then be responsible for processing these images, analyzing them to draw conclusions such as the position of the ball, its speed and acceleration.
-
Then it is feed to PID controller and transmitting the result by USB to the Arduino which will control the rotation of both servos independently.
-
All the data will be sent to the Python program running in another computer using MQTT protocol. And the results would be plotted.
- Amoghavarsha S G
- Niranjana Jois H C
- Kiran C N


- Hardware
- Raspberry Pi 4B
- Pi Camera
- PC
- Arduino
- 2 Servo motors
- Universal Joint
- 2 Push rods
- Software
- On both Raspberry Pi and PC
- opencv-contrib-python
- numpy
- json
- paho_mqtt
- threading
- On Raspberry PI
- pyserial
- mosquitto broker
- On PC
- pyqtgraph
- Qt5
- On both Raspberry Pi and PC
-
Raspberry pi
- Install raspberry pi os.
- Install mosquitto broker on your Raspberry PI.
sudo apt install mosquitto
- Install all the python packages mentioned above.
- git clone this repositiory
- we only need on-pi directory files here
-
Arduino
- Clone this repository on PC
- Upload the on-arduino.ino file in on-arduino directory to the Arduino.
- By default pin 5 is for X-axis servo and 6 for Y-axis servo.
-
PC
-
Go to interface-on-pc directory
-
run
startInterface.shif on linux orstartInterface.batif on windows -
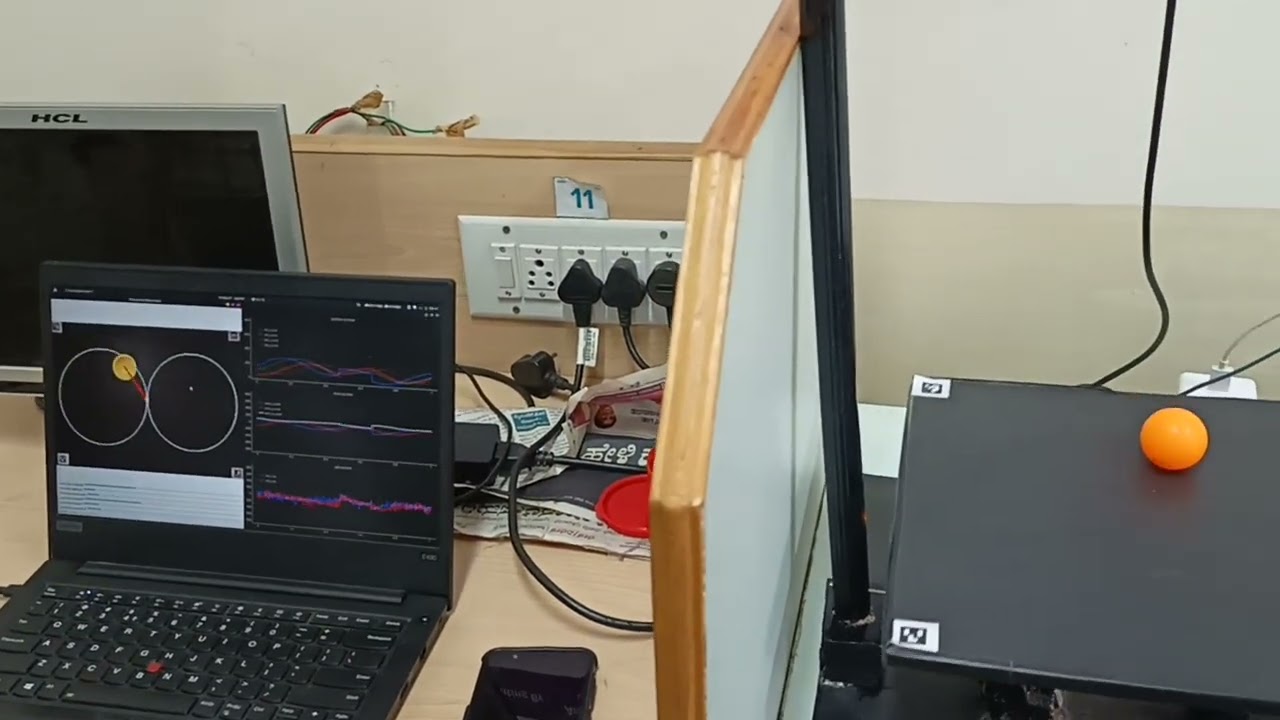
Interface Image

-
-
Table
-
Table Image

-
Aruco Marker order (aruco.DICT_4X4_50)
- Top left: ID 0
- Top Right: ID 1
- Bottom Right: ID 2
- Bottom Left: ID 3
-
You can change the ID's or their order. If you do, then:
- In
on-pi/main.pychange the listaruco_marker_orderin order mentioned above.
- In
-
-
Servo Motors
-
Servo Placement

-
Distance from centre to both x and y axis servo:
8cm
-
-
Raspberry Pi and Pi Camera

-
Overall Structure


