Welcome to this workshop! We're going to build a Discord bot with discord.py and Python. Let's dive right into it!
- Python and Pip
- A Discord account
-
Make sure you’re logged on to the Discord website.
-
Navigate to the application page
-
Click on the “New Application” button.
-
Give the application a name and click “Create”.
-
Create a Bot User by navigating to the “Bot” tab and clicking “Add Bot”.
- Click “Yes, do it!” to continue.
-
If you want others to invite your bot, make sure that Public Bot is ticked. Also, make sure that Require OAuth2 Code Grant is unchecked.
-
Copy the token using the “Copy” button.
- NOTE: This is not the same thing as the Client Secret on the General Information page
- WARNING: This token is equivalent to your bot's password, so do not share it with anyone.


-
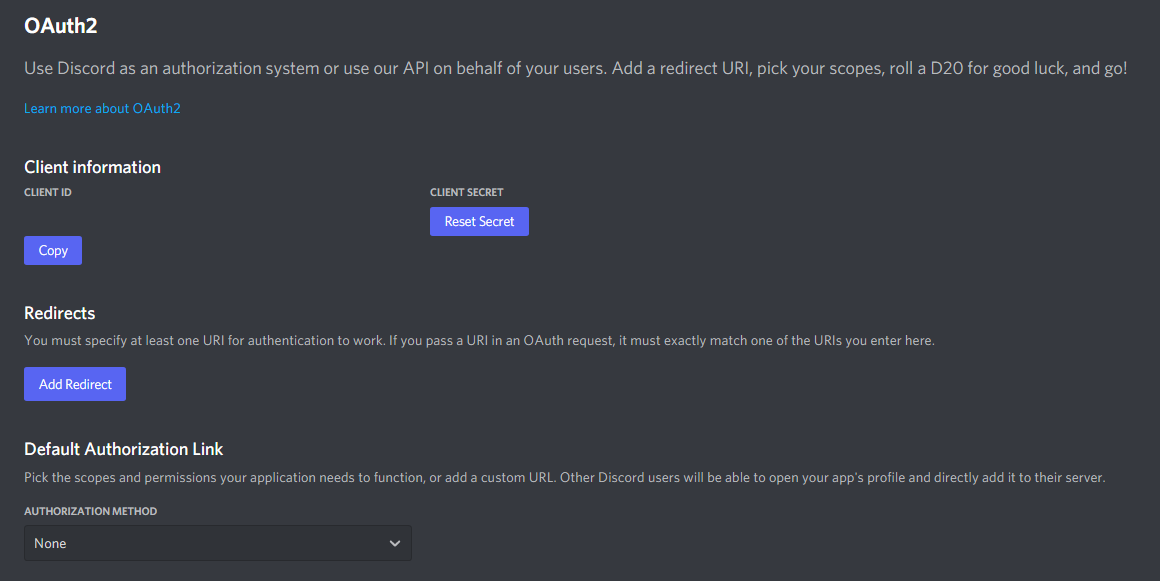
Go to the “OAuth2” tab
-
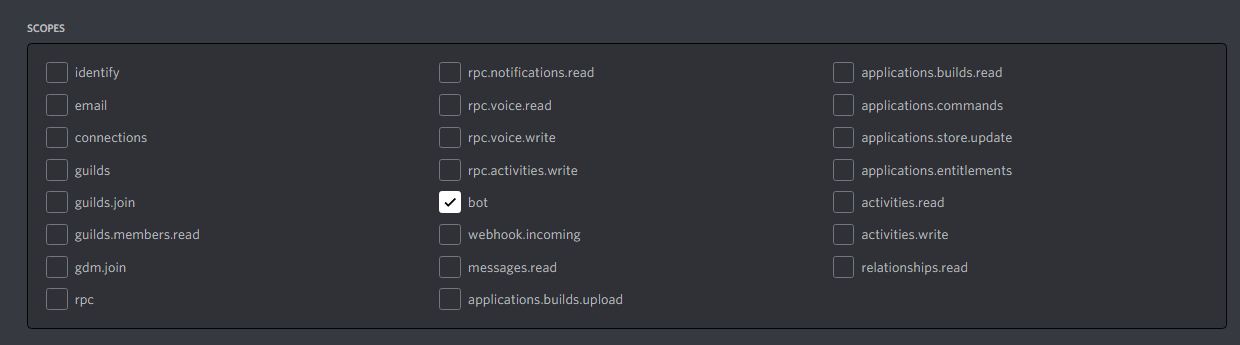
Tick the “bot” checkbox under “scopes”
-
Tick the permissions required for your bot to function under “Bot Permissions”
-
Now the resulting URL can be used to add your bot to a server. Copy and paste the URL into your browser, choose a server to invite the bot to, and click “Authorize”.

Source: https://discordpy.readthedocs.io/en/latest/discord.html
- Install or upgrade discord.py:
python -m pip install discord.py- NOTE: you may need to use a variation of the pip command depending on your platform.
- Create a new file called
.envthat is a copy of the contents of.env-example. - Replace
placeholder_tokenwithin the.envwith your token that you can acquire from part 7 of step 1. Do not share this token with anyone, it's your bot's password.
Examples of what you can do with a basic bot can be found in the main.py file.