-
Prepare the SD Card
-
Download the latest PlanktoScope release.
-
Flash the release to an SD card using Raspberry Pi Imager.
- Open Raspberry Pi Imager.
- Select "Choose OS" and locate the PlanktoScope image.
- Select "Choose Storage" and pick your SD card.
- Click "Write" to flash the image.
-
Insert the SD card into the PlanktoScope.
-
-
Connect to the Local Network
- Use an Ethernet cable to connect the PlanktoScope to your local router.
- Power on the PlanktoScope.
-
Connect the PlanktoScope to Wi-Fi
- Once the PlanktoScope’s Wi-Fi becomes visible, use your computer or mobile device to connect it to your local router’s Wi-Fi network.
-
Check Your Router’s Admin Panel
-
Open your router’s admin interface by entering one of these common addresses into your browser:
http://192.168.0.1http://192.168.1.1http://routerlogin.net
-
Log in using your router’s credentials (check your router label or manual for default credentials).
-
-
Locate Connected Devices
-
Navigate to the section listing connected devices, such as:
- "Connected Devices"
- "Device List"
- "DHCP Clients"
-
Look for the device labeled PlanktoScope or a similar name under the Ethernet or Wi-Fi section.
-
-
Use Network Scanning Tools (Optional)
If you can’t access your router:-
Windows: Use Advanced IP Scanner.
-
macOS/Linux: Run a network scan with
nmapor similar tools:nmap -sn 192.168.1.0/24
-
Look for the PlanktoScope in the results.
-
-
Verify the Landing Page
- Open a browser and enter the PlanktoScope’s IP address (e.g.,
http://192.168.x.x) to access the Landing Page.
- Open a browser and enter the PlanktoScope’s IP address (e.g.,
To enable essential Node-RED features, edit the settings.js file.
-
Access the File
- Use SSH or navigate via the System File Manager link on the Landing Page:
http://192.168.x.x/admin/fs/files/etc/nodered/settings.js.
- Use SSH or navigate via the System File Manager link on the Landing Page:
-
Enable Context Storage
-
This feature allows data to persist between Node-RED reboots.
-
Remove the comments between line 265 and line 269:
contextStorage: {
    default: {
        module: "localfilesystem"
    },
},
-
-
Enable Project Mode
-
This feature enables version control in Node-RED.
-
Set the
enabledvalue totrueon line 338:projects: { /** To enable the Projects feature, set this value to true */ enabled: true, workflow: { /** Set the default projects workflow mode. * - manual - you must manually commit changes * - auto - changes are automatically committed * This can be overridden per-user from the 'Git config' * section of 'User Settings' within the editor */ mode: "manual" } },
-
-
Save and Restart
- Save the changes to
settings.js. - Restart the PlanktoScope using the Reboot button in the Node-RED dashboard:
http://192.168.x.x/ps/node-red-v2/ui/#!/8.
- Save the changes to
With these steps, your PlanktoScope is fully configured and ready for use.
After rebooting, access the dashboard editor at: http://192.168.x.x/admin/ps/node-red-v2/.
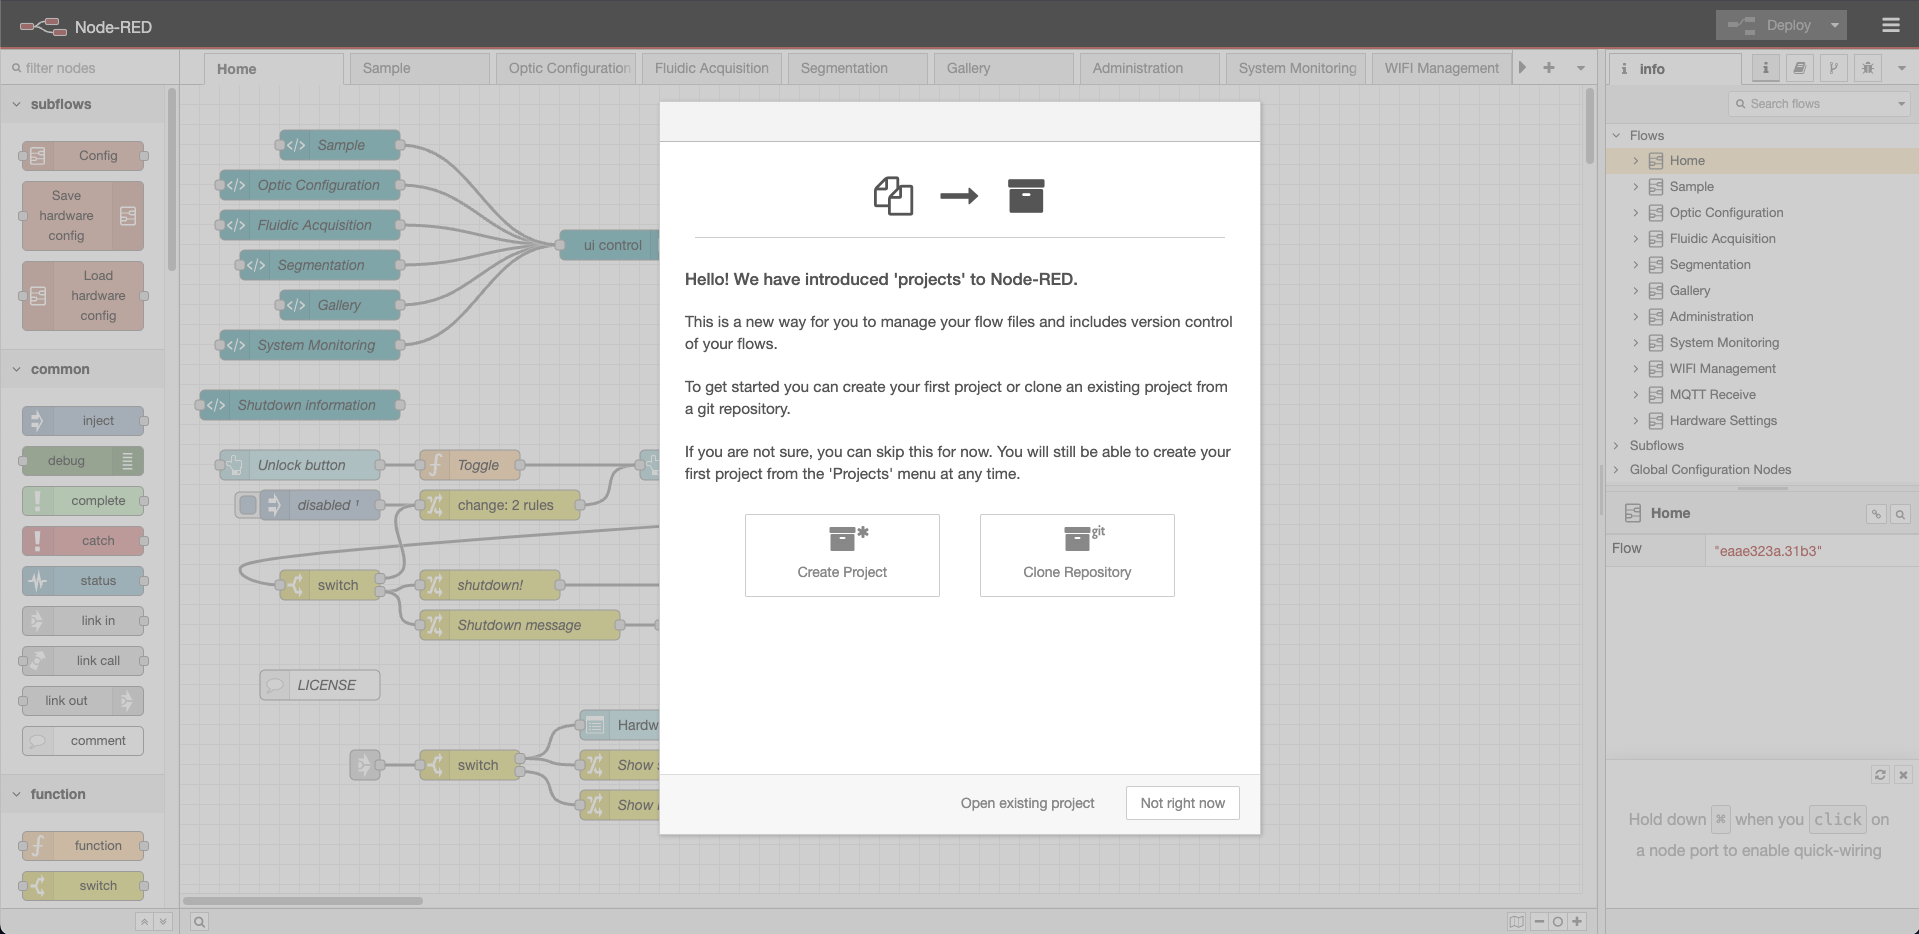
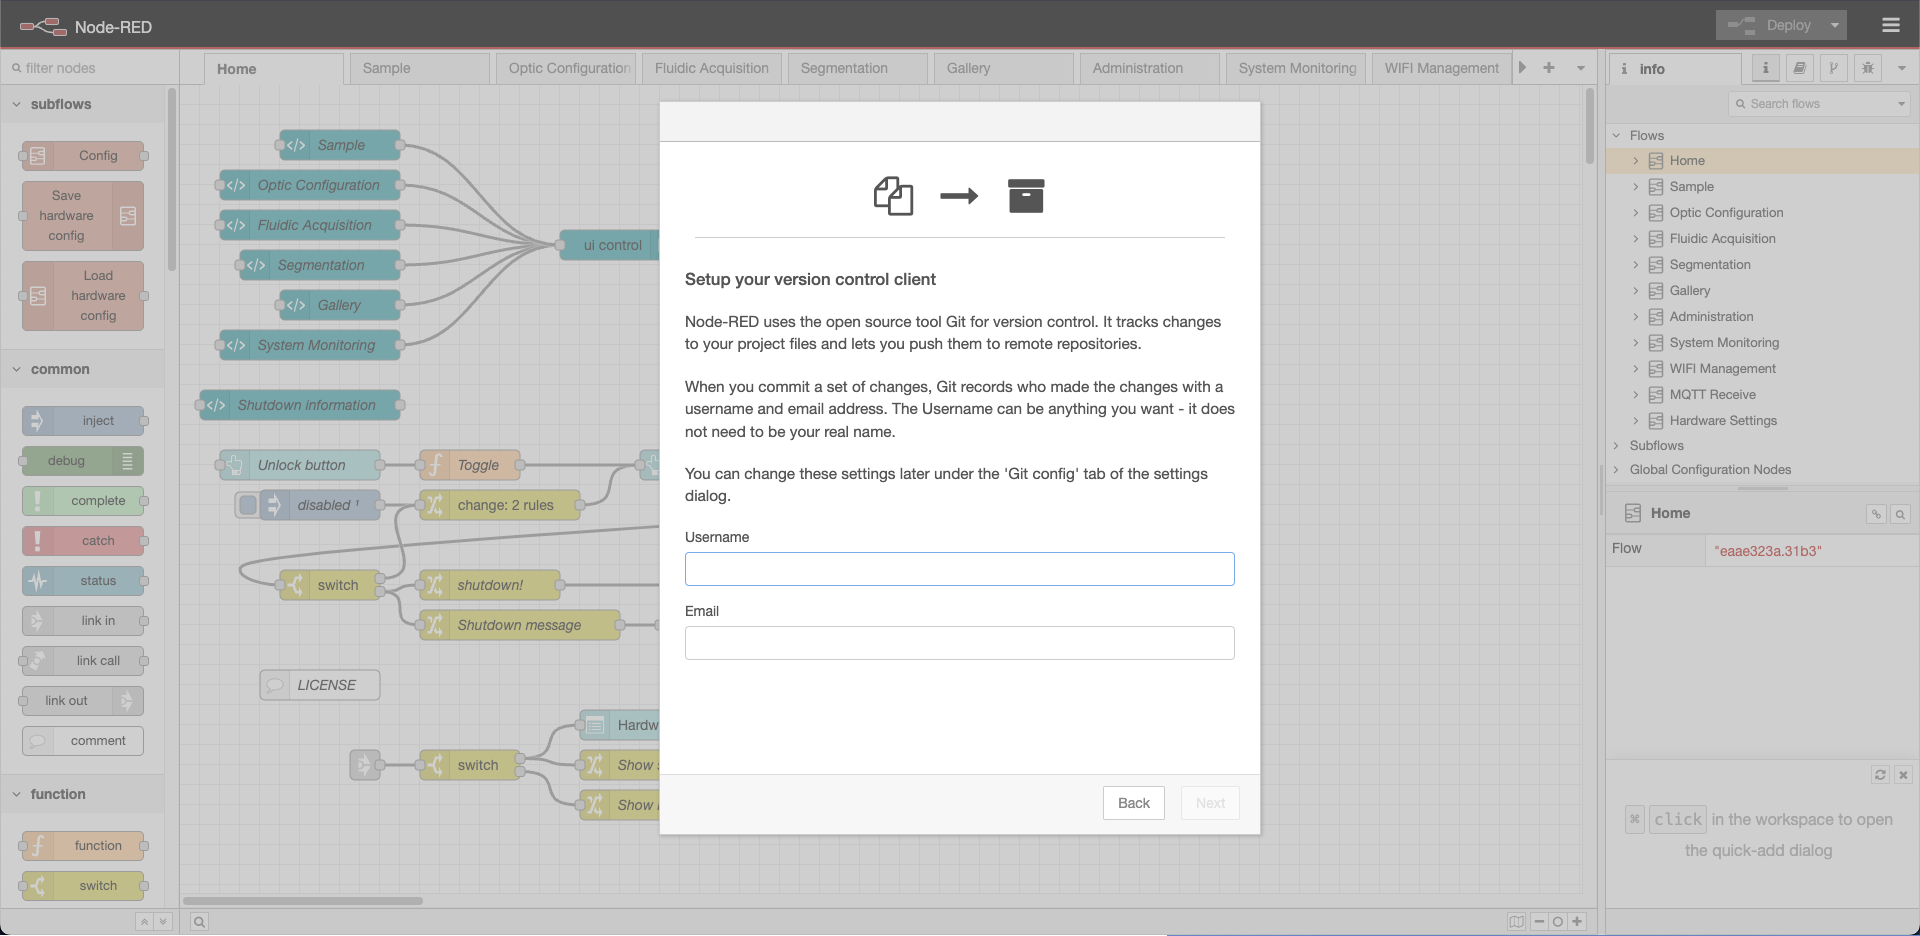
Node-RED will display a pop-up inviting you to clone the dashboard repository. Click on Clone Repository.
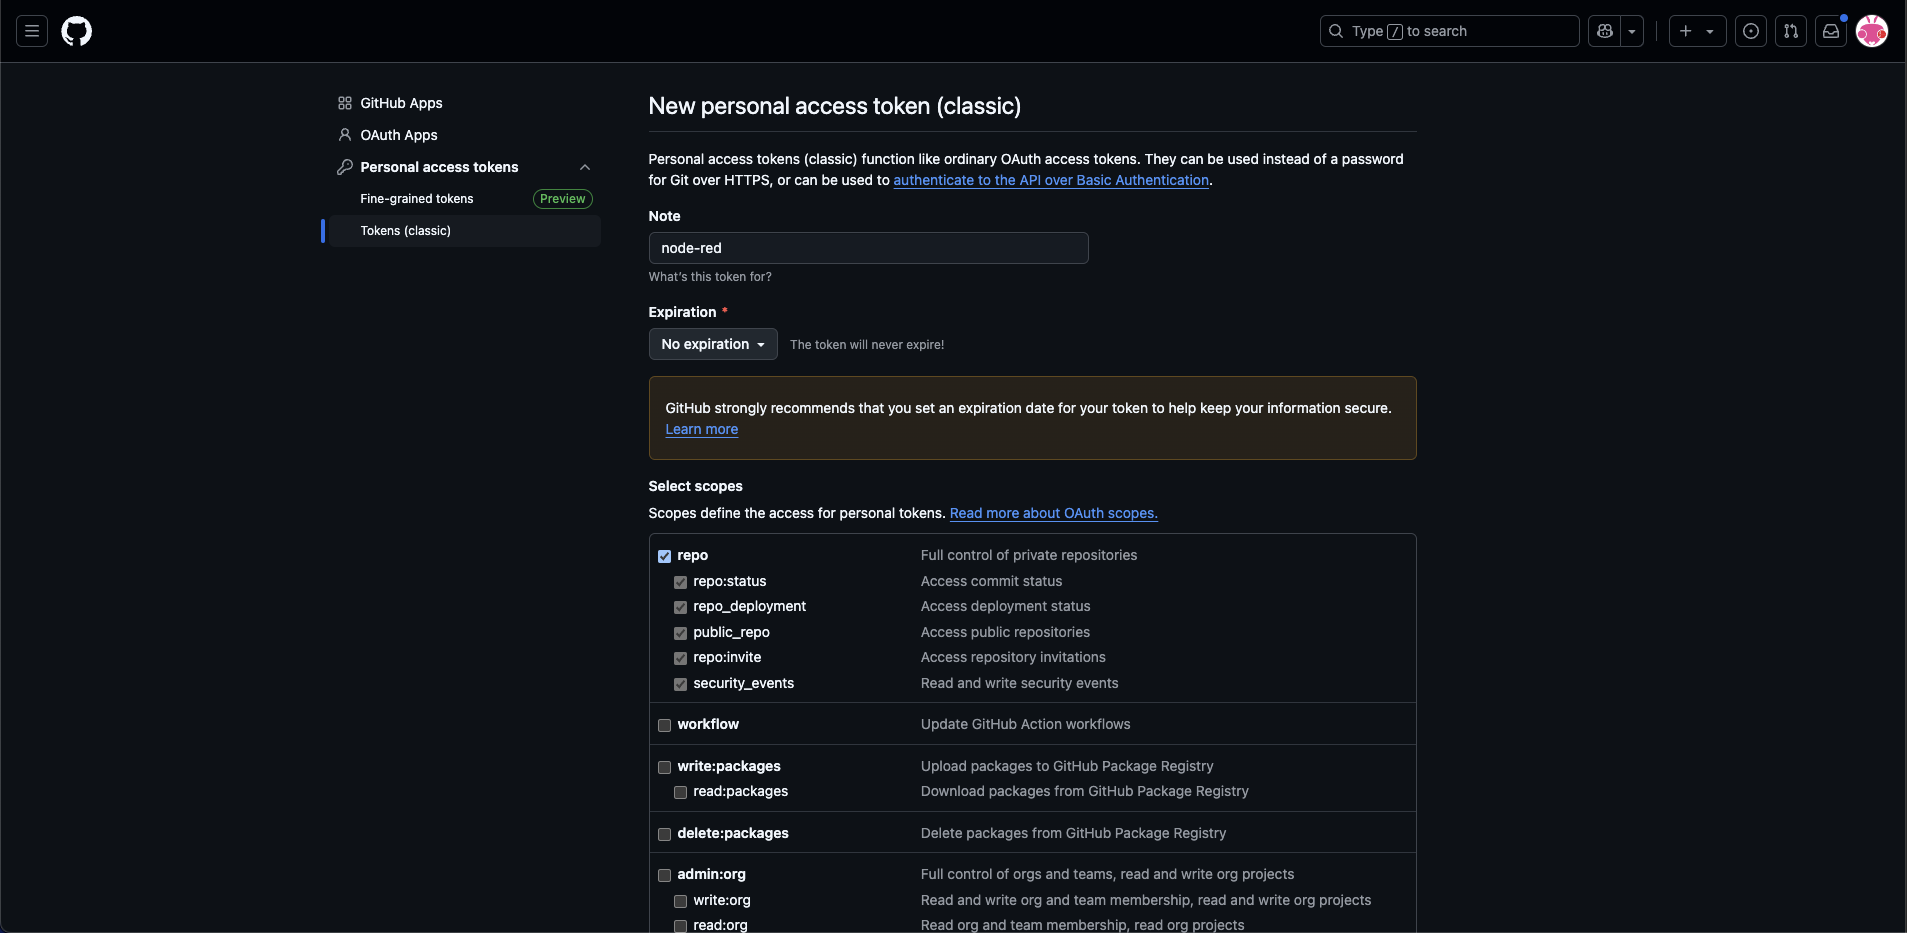
To complete the form, you need to create a Personal Access Token (classic):
- Visit https://github.com/settings/tokens.
- Click Generate new token or Generate new token (classic).
- Enter a name for the token, such as node-red.
- Select No Expiration and check the repo and user scopes.
- Click Generate token at the bottom of the page.
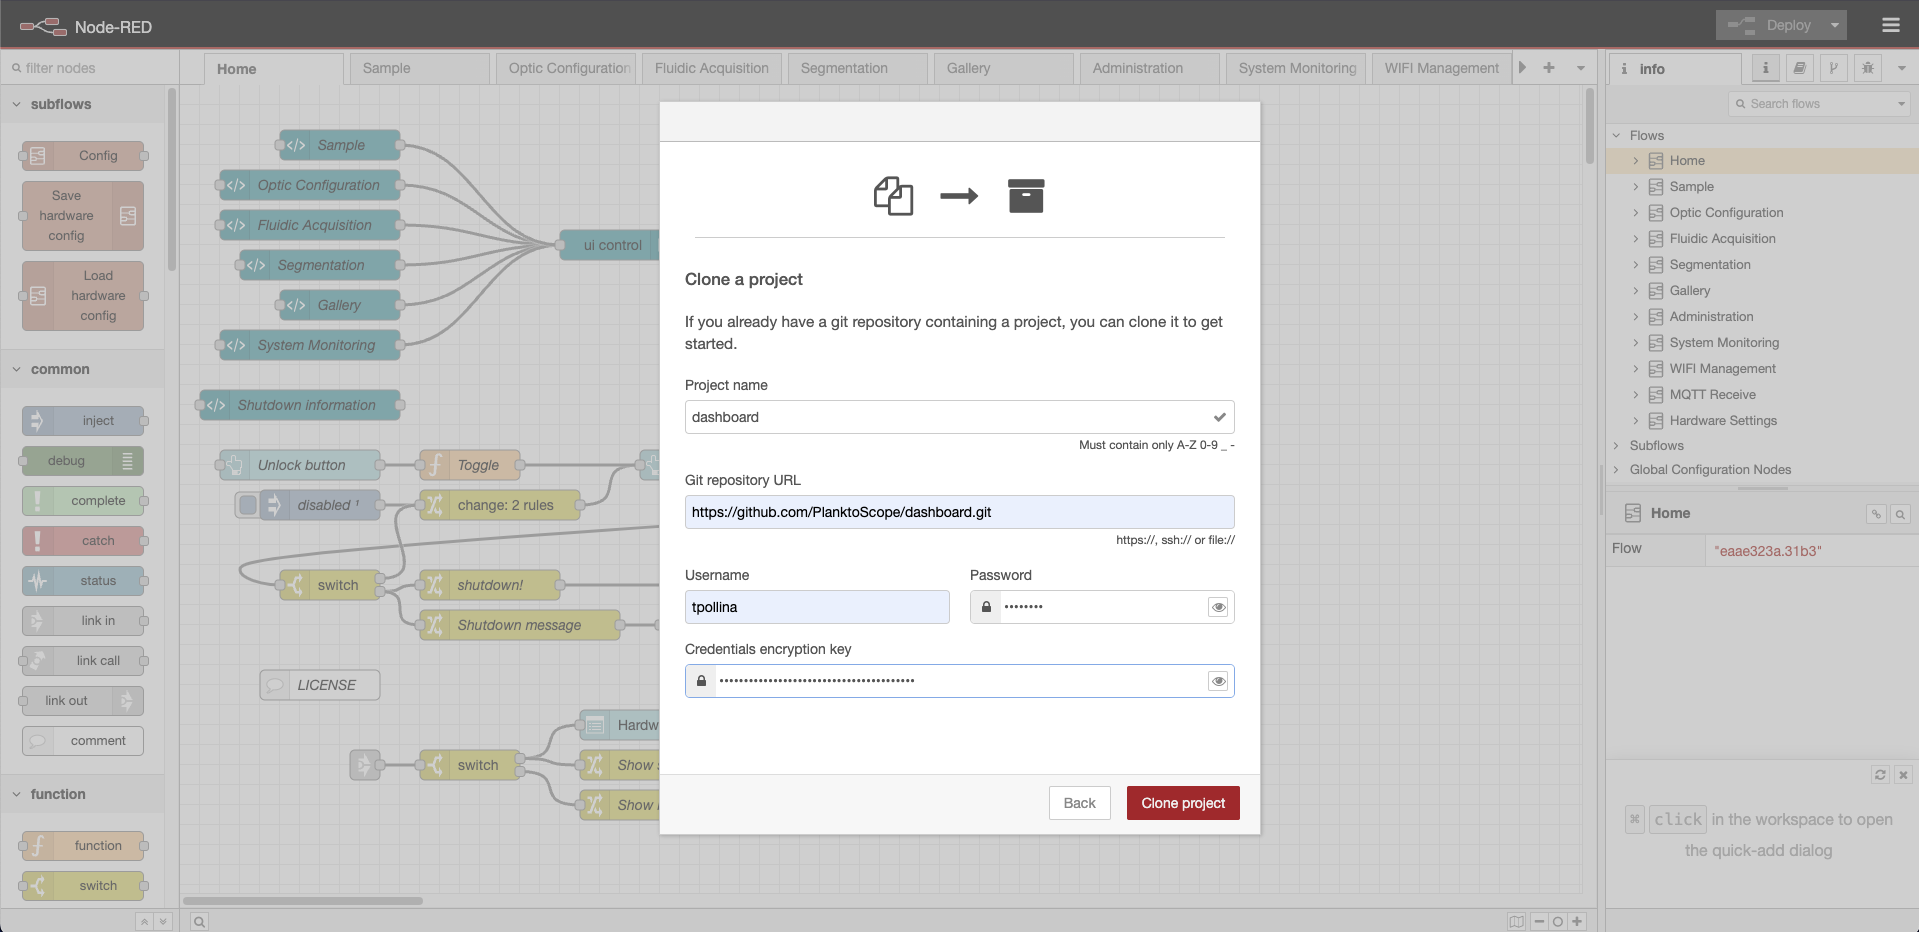
Copy the generated token from GitHub. Complete the remaining fields in the Node-RED form using your GitHub credentials, and click Clone Project to link Node-RED to your GitHub account.
Remove unnecessary palettes to streamline your Node-RED setup:
- node-red-contrib-dir2files
- node-red-contrib-gpsd
- node-red-contrib-python3-function
- node-red-contrib-ui-multistate-switch
- node-red-dashboard
- node-red-node-pi-gpio
- node-red-node-ui-list
After cleanup, install the following nodes:
@flowfuse/node-red-dashboard@flowfuse/node-red-dashboard-2-ui-flowviewer
With Context Storage enabled, data can be stored in a file located at:
http://192.168.x.x/admin/fs/files/home/pi/.node-red/context/global/global.json.
To retrieve a value stored in this file, use the following script in a Function Node:
// Retrieve the global variable
msg.variable = global.get('variable');
return msg;<template>
<v-text-field
label="My variable"
variant="outlined"
v-model="msg.variable"
@update:model-value="send({ variable: msg.variable })"
></v-text-field>
</template>To set a value in the file, use the following script in a Function Node:
// Set a value in the global context
global.set('variable', msg.variable);
return msg;


