Note: this tutorial should be following two or more times (either by the same or other individuals) so you have another to chat with!
| Station 1 | Station 2 |
|---|---|
 |
 |
- Raspberry Pi w/ Raspberry Pi OS (full-version)
- TTL Thermal Printer
- Pi Camera Module (ribbon connection)
- If this is your first time working with a RPI, see the linked guide to set up your Pi with Raspberry Pi OS.
- With the RPI powered off, attach the Pi cam module via the ribbon connector labeled camera (not display).
- Test your cam - pull this git repo and run the script titled autocameracapture.py for a minute or so. If you see images starting to populate in a sub-directory called "captures" then you are set! If not you may need to debug your camera - check raspi-config to ensure necessary permissions are given. Note: the picamera python module should be installed (sorry! requirements.txt coming soon!)
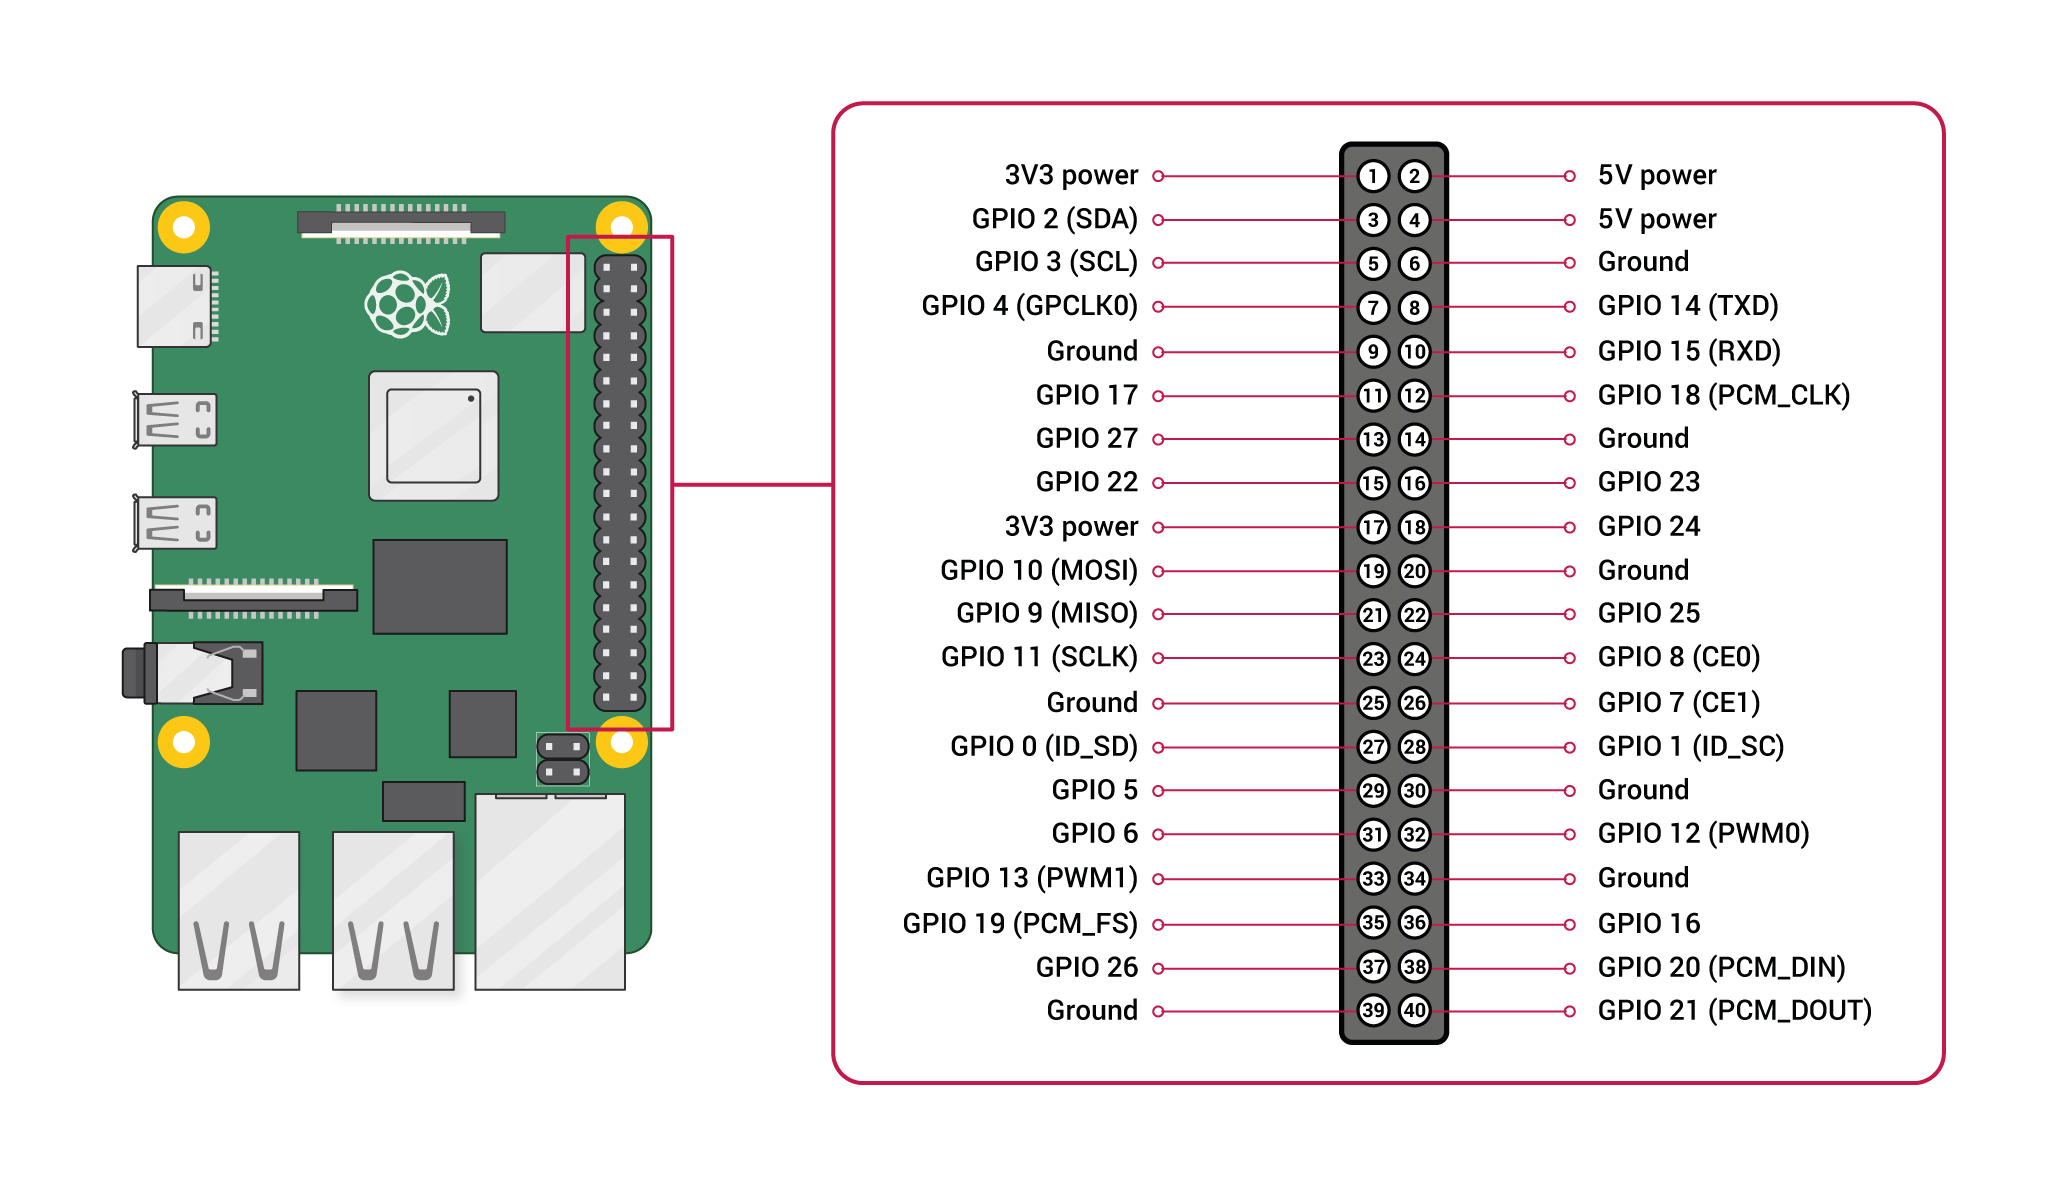
- Next, with both the RPI and printer unpowered - attach the thermal printer. The ground, RX & TX pins pictured below are where you want to connect the two. Black to ground, Yellow to TX, Green to RX.
- Time to power it all on so you can configure & test your printer! If your printer came with a test printout in the box, look at it closely for voltage and baud rate. Either way follow steps in the Adafruit tutorial linked here to enable printing via lp & over the network on your printer. Be sure to only follow steps relevant for TTL printers - USB steps do not apply.
- Note: if your printer is still printing gibberish try making sure the voltage is correct & rebooting.
- Now that your pi cam and thermal printer are all set up, time to run the code! Navigate to the tcpTest directory. Run reciever.py to see our images & sender.py to send your own (or better yet - both at the same time to do both!).
That's the gist! Reach out with any Qs.
